Showing posts with label cheesemaking. Show all posts

Thursday, November 29, 2012

Farmhouse Cheddar


After the cheese press was completed I set out to try my first hard cheese. Jeri at New England Cheesemaking suggested Farmhouse Cheddar as the easiest, fastest first cheese to make.


I am going to post the recipe as it appears in Home Cheesemaking and then will tell you what I actually did differently.

2 gallons whole milk
1 packet direct set mesophilic starter or 4 oz prepared mesophilic starter
1/2 tsp liquid rennet or 1/2 rennet tablet- diluted in 1/4 c cool unchlorinated water
1 Tbs cheese salt
cheese wax
clean break of curds


Heat milk to 90 degrees F (*goat's milk to 85)
Add starter and stir thoroughly, cover and let ripen 45 minutes.

Add the diluted rennet and stir gently with an up and down motion for 1 minute, if using farm fresh milk top stir 1 minute no more than 1/2 inch deep to blend butterfat., cover and let set at 90 degrees* for 45 minutes or until curds give clean break.  Cut into 1/2 in cubes. See above photo.

Place the pot in a sink full of hot water and  heat curds to 100 degrees, increasing temp slowly- I found this the hardest part, it says to increase about 2 degrees every 5 minutes but mine just stayed hotter so I really only added hot water once. Just keep checking your temp at various levels. Gently stir from time to time, I used this to keep it from building too much heat, it also keeps your curds from matting.
Your curds will shrink some and your whey amount will increase.
cover and let set 5 minutes


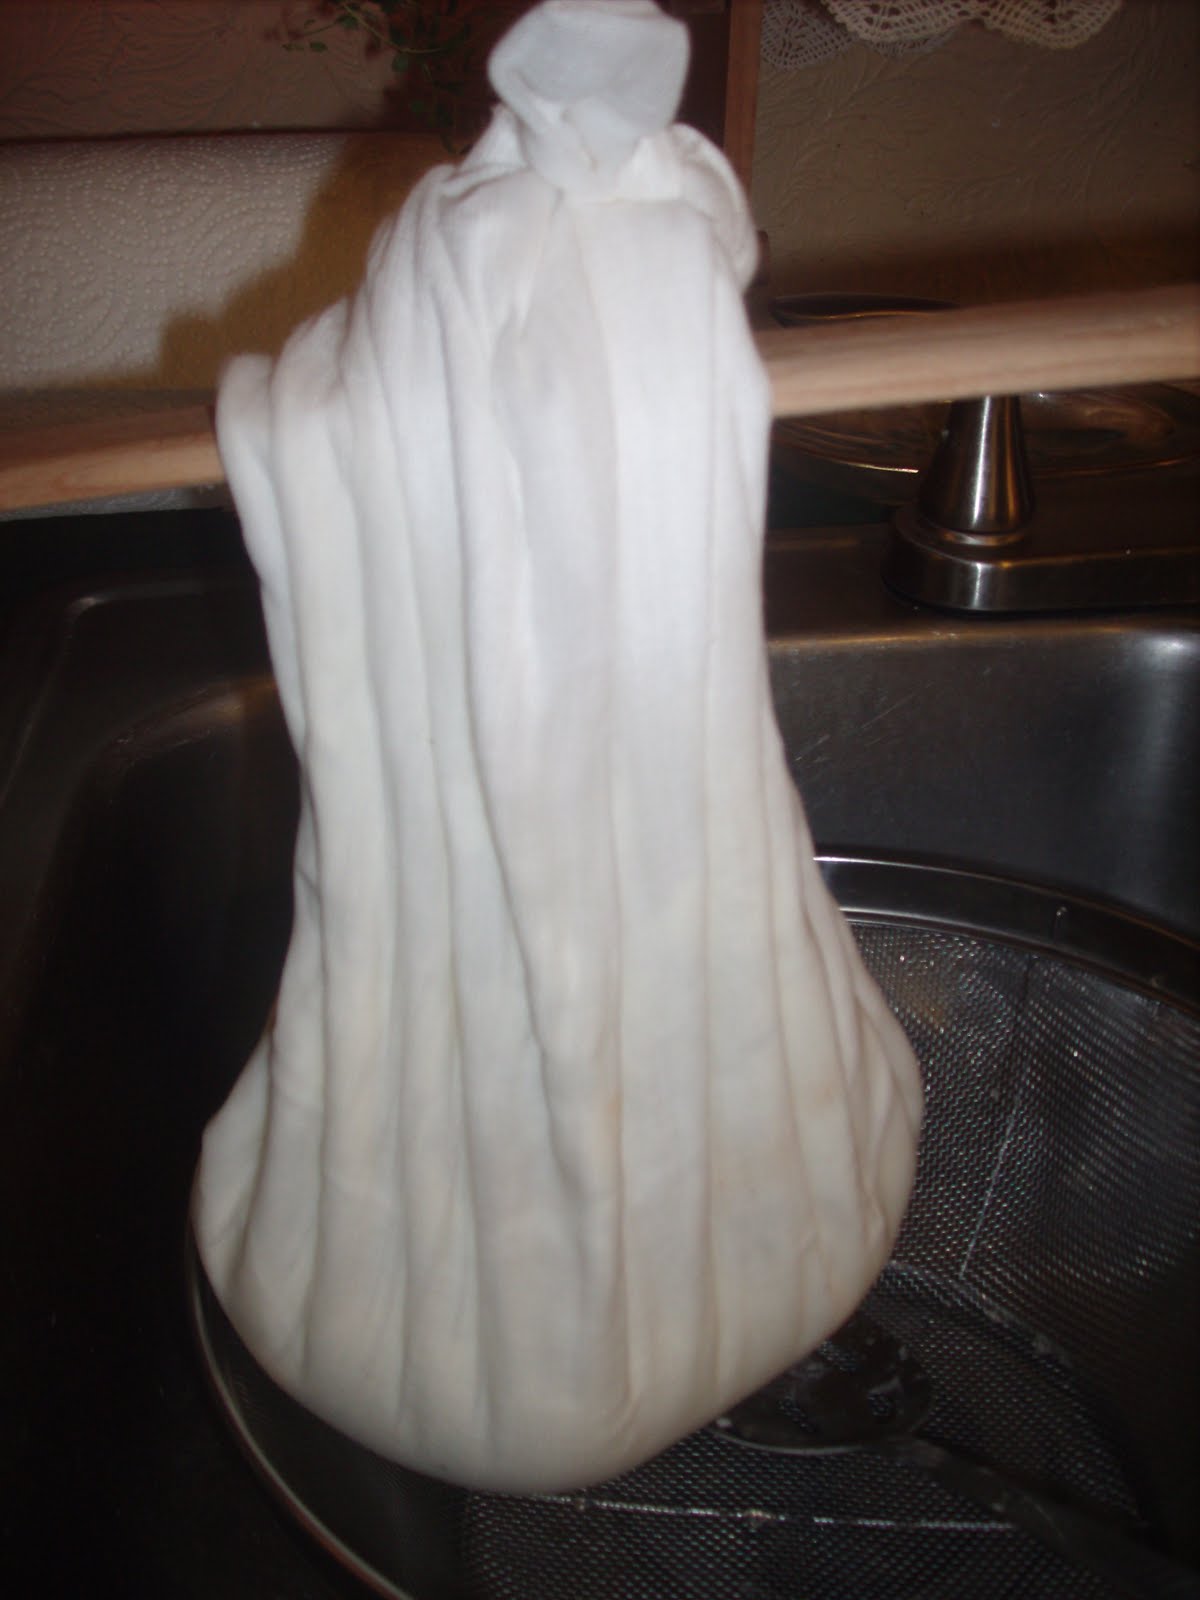
Pour curds through a cheesecloth lined colander, tie corners in a knot and hang bag in draft free spot for 1 hour. Curds need to stay warm, I left them hanging in the sink with the warm pot below .
Place curds in bowl and break apart, Add salt.
Firmly pack into 2 pound mold lined with cheesecloth, cover top, apply 10 pounds pressure 10 minutes, remove, flip cheese and re-wrap, press at 20 pounds for 10 minutes.
Repeat and press at 50 pounds for 12 hours.

filled gallon jugs of water weight approx 8 pounds


first press


second press


after last press

Remove cheese and peel away cheesecloth, air dry at room temp on a wooden board until rind has developed, 2-4 days, flipping often.
Wax cheese
Age for at least 1 month
yield- 2 pounds

So.....
Here is a few things I did different and my results
first I thought I had too big of a mold so I doubled the recipe, my pot only fit 3 1/2 gallons though- ended up being 2 gallons of raw milk and 1  1/2 gallons store bought whole.
Doubled everything else and it worked out fine.
I think I should have waited another day or two for the air dry, I rushed it a little and fought a bit of mold, nothing to worry about but a little more drying would have helped I think.
If you see some white mold forming, wipe the area with vinegar.
Waxing-
Devote your pot and brush to permanent waxing- they will be of no use for anything else again.
waxing is messy! I have a double boiler that I now will use and also use for storage to keep the wax in. As we unwrap the cheese I will also just toss in the wax because you can remelt and reuse it.

After trying the cheese-
there was minimal white mold, easily scraped off no harm to the cheese and I think again it was because it needed more air dry time before waxing.
Sharp taste, dry and a little crumbly just like the recipe said it would be. I think it needs a cracker, my husband ate it as is and the dog liked it...so it must have worked!
Now onto more variety!!


Friday, November 16, 2012

How to Make Your Own Cheese Press


Time to start the hard cheese!
I got my husband talked into fabbing up a home made cheese press.
Really it was so easy we should have done it a long time ago. I think I could have done it myself, but then I wouldn't have anything to bother him with.


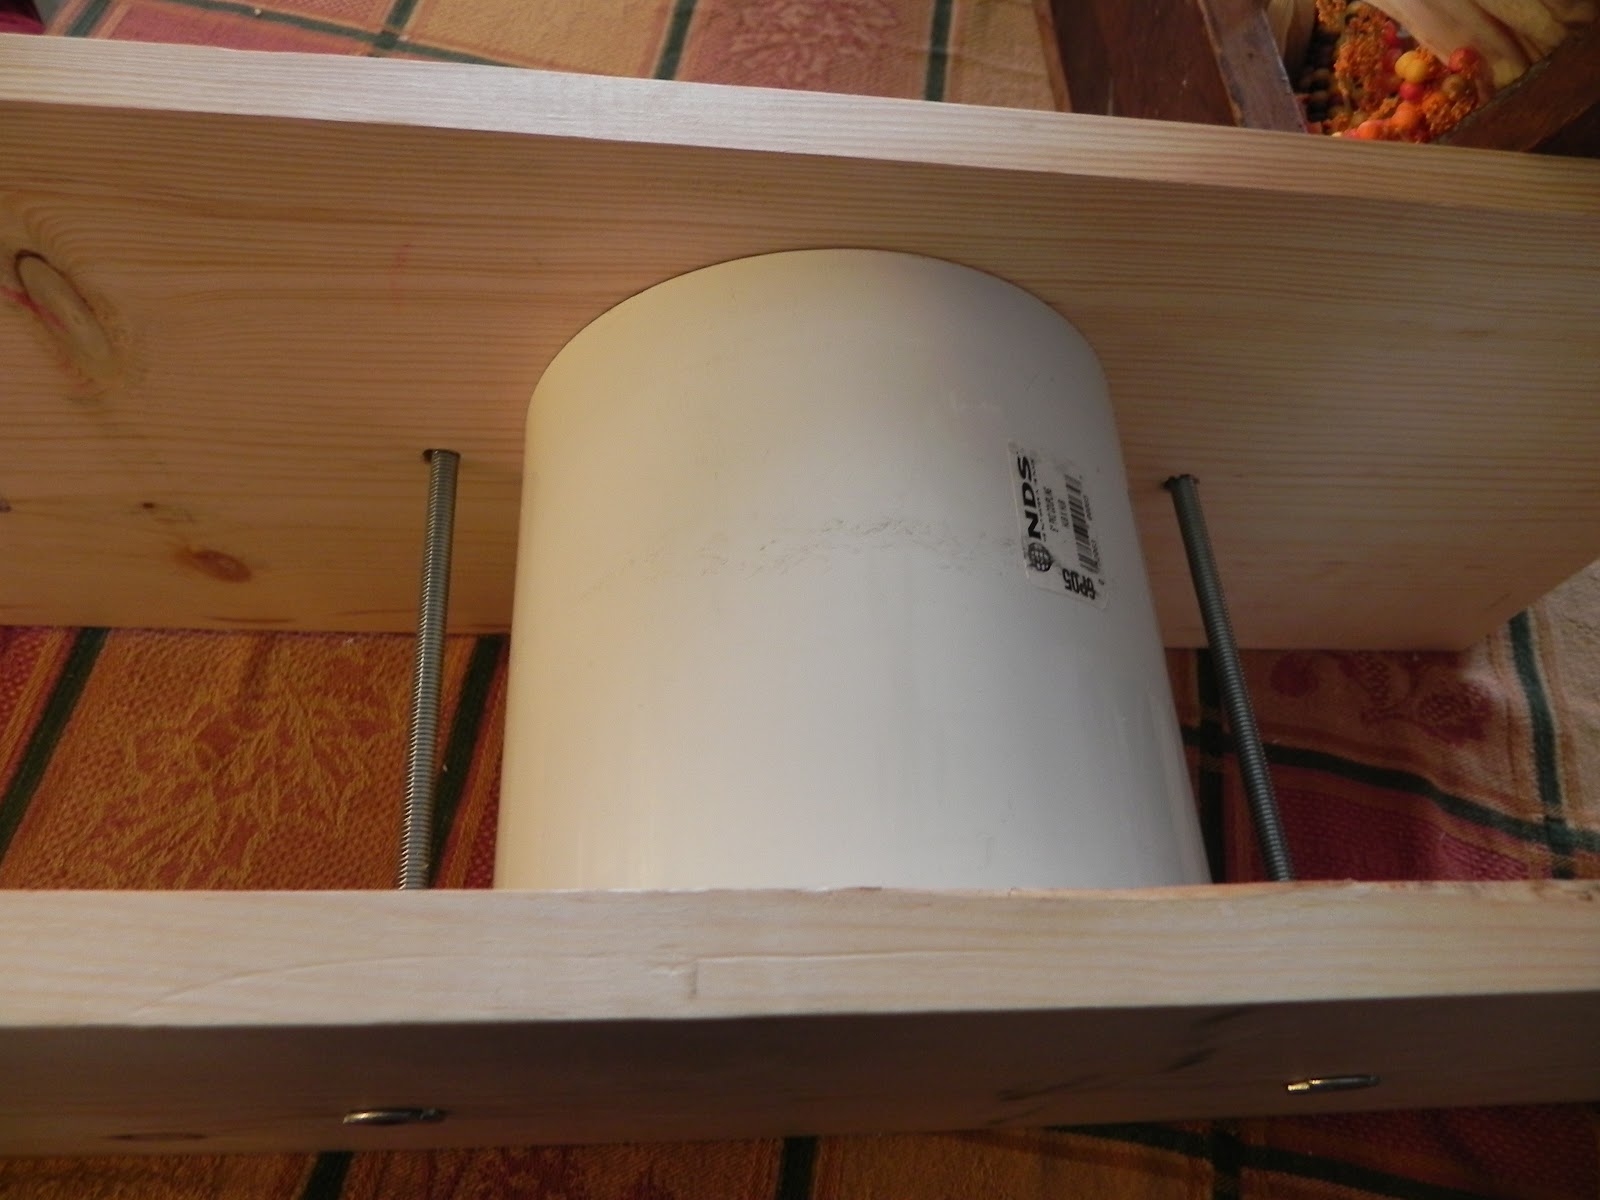
We got two drop boards, small boards left over from trimming larger ones, at a local hardware store, These are usually available for a great price, I think we paid about a dollar for both.


a piece of PVC pipe, we went with 6 inch for now but you can make various sizes for the cheese wheels you will be making.


a smaller piece of PVC 3" for use as a ram to help apply even pressure on the metal disk that will rest on the cheese. The disk was in the shower supply section.

All thread rod cut into two 12" pieces and wing nuts hold everything in place and allow for adjusting pressure.


Use washers top and bottom

Less than $20 in materials for a great cheese press that comes apart easily for storage.

shown in use

Thursday, November 1, 2012

Make Your Own Butter


Di you know you could make your own butter? I am sure you did, but you can without a churn and without a cow.
I was fortunate enough to have a cow...sort of. I bought milk from a friend and the cream resting on top became ....butter! go figure
All you need to do with your cream is place it in a quart jar. And shake, shake, shake.....


you can add a cork to help with agitation but it is not necessary.


I have seen videos that say it takes about 10 minutes, but no, both times I have made it, 20-25 minutes of shaking was more like it. I recommend having someone else on hand to pass it off to when your tired.
Kind of like that shake exerciser that works the muscles and helps you loose weight...yeah right!
 When your done, your butter will separate from the buttermilk, drain it and save the buttermilk for pancakes!!
butter and buttermilk


Yeah, that ought to work!

Wednesday, May 18, 2011

A wonderful feature, I am truly honored.

North Dakota Kitchen is truly honored to have been featured at New England cheese making!!  Thank you to Jeri for her wonderful interview and time spent getting to know me via my blogs! Stop by and check it out.   http://cheesemakinghelp.blogspot.com/2011/05/shannon-olson-making-buttermilk-cheese.html


Monday, May 16, 2011

Ricotta Salata


 I am in love with this cheese!
So far everyone that has tried it, has asked for more. Wonderful salty, sharp just perfect for snacking or with a good crusty bread.


This recipe is from  Home Cheese Making by Ricki Carroll


 For this recipe I started with whole raw milk, skimming the lovely cream off the top and setting aside for another use.


 Prepare your butter muslin, line a colander and place in a bowl to catch whey.

Mix 1 tsp citric acid that has been dissolved in 1/4 c cool water into 1 gallon whole milk.
In large pot heat to 185- 195 degrees, Do Not Boil. Stir often to prevent scorching.
Mine came together around 192 degrees.


 As curds and whey separate turn off the heat. Make sure whey is not milky.
Let set undisturbed 10 minutes.


 Ladle curds into butter muslin, tie corners in a knot and let hang 20-30 minutes.
  (AT this point you can now add 1 tsp salt and 1-2 Tbs cream and store in fridge for whole milk ricotta)
If not... skip instructions in parenthesis and continue on


 Remove ricotta from muslin and add 1Tbs cheese salt, Press into muslin lined ricotta mold and put a saucer and glass of water on top, Press 12 hours.


 Unmold and rub surface with salt, cover and refrigerate. Turn cheese and rub with salt everyday for 1 week.
Remove any mold with salt water dampened cheesecloth. I did not get any mold.
If cheese becomes  too soft,  dry surface and resalt.
I kept my cheese in the butter muslin wrapped loosely and in the mold, stored in the fridge top shelf.
Age 2-4 weeks.
Warning if you taste it you won't be able to stop!


Now with that left over whey why not make a batch of English Muffin Bread

Monday, September 13, 2010

Dry Buttermilk Cheese

Heat buttermilk to a large stainless steel pot. I used 2 quarts.
Stir occasionally until 160 degrees, you will see curds and whey separating, if they do not separate, heat to 180.
Remove from heat and pour into a colander lined with butter muslin or several layers of good quality cheese cloth., Tie corners of cloth and hand to drip 6-12 hours.

Place cheese in bowl and add salt to taste. use uniodized salt
You may press with small weight if you like. This cheese is very crumbly. You may adjust time hanging, checking the texture from time to time until it is as you would like.
For a more sour cheese, let buttermilk set out at 72 degrees for 24 hours before beginning the cooking process.
Store in refrigerator for 3 weeks.

Saturday, September 11, 2010

Goat Cheese


Goat Cheese
Easy to make and good to eat!


1 gallon of goat milk, you may used unpasteurized or pasteurized (shown here). Never use ultra pasteurized milk of any kind for cheese making.

You will need cheese cloth. The piece on the left is referred to as butter muslin and is very fine  and strong. On the right is cheese cloth you will find in a fabric store and is used further in the process, you can see how much wider the weave is, if you use this for draining you will have to quadruple or more the fold so you don't loose small curds down the drain.

In a large stainless steel pot slowly heat milk to between 190 and 200 degrees.
Add 1/2 c vinegar or 1/2 c lemon or lime juice, stir until mixed only, do not over mix.

Let cool undisturbed until 100 degrees.
Add salt to taste. 1 1/2 Tbs for softer cheese, up to 2 1/2 Tbs for firmer cheese, ricotta or cottage cheese texture.

Curds will separate from the whey...the yellow water is whey.
Slowly stir, gently breaking up the curds. More stirring will result in fine ricotta like pieces, less stirring  and leaving pieces quarter size will give a cream cheese consistency.
Remove the curds with a very fine strainer, and place into a colander lined with butter muslin. Tie muslin and hang to drip 4-12 hours, until desired consistency.

Remove from cloth and add herbs if you like, form in ball in cheese cloth and refrigerate. Remove cloth when chilled. Good for 2 weeks.

Do not use aluminum pots or utensils.

Friday, September 10, 2010

Mozzarella Cheese


Easy Mozzarella, made from cow's milk.


Dissolve 1 1/2 level tsp of citric acid in 1/2 c cool water.
Place 1 gallon milk in large stainless steel pot. Bring milk to 55 degrees and while stirring add citric acid. Mix thoroughly.
(You may add 1/8 to 1/4 tsp lipase powder dissolved in 1/4 c cool water, allowed to sit 20 min) I did not do this step because at the time I did not have lipase. I will in the future add this step for flavor. To learn more about Lipase and its addition to Pasteurized milk see this article.
Heat the milk to 90, stirring constantly, Remove from heat and stir in
1/4 tsp liquid rennet or 1/4 tablet rennet diluted in 1/4 c unchlorinated water

Stir in an up and down motion for 30 seconds, cover pot and leave undisturbed 5 min.


Milk should form one large curd with a clean break seen here. If too soft  or too milky, let stand a few more minutes.

Cut the curd with your knife all the way down to bottom of pot, vertical, horizontal and the at an angel of about 45 degrees, to make even curds throughout the pot.


Place pot back on stove and heat to 105 degrees, gently stirring. Remove from heat and stir another 2-5 min.


Scoop out curds and place in 2 quart microwaveable bowl. Use the back of your hand to remove as much whey as possible, there is a lot of liquid so you may do this a few times. Microwave on high 1 min ( use discretion with your microwave, I went 45 sec this time, it is better to do a little too short a time than too long)
Remove as much liquid as possible again with back of your hand or back of large spoon. Gently knead cheese, Place back into microwave for 35 seconds.


 Again remove excess liquid and knead. Add 1 tsp cheese salt (uniodized). Place in mic another 35 seconds. Knead until smooth like taffy, to evenly distribute heat.  If cheese is breaking it has become too cool and must be reheated. 

You may eat it now or

Roll into balls and place in ice water to cool evenly. Refrigerate wrapped for up to 2 weeks!

Enjoy!
Cheesemaking hints and supplies at
and 

I highly recommend this book, easy and many recipes, this Mozzarella came from it also.


Funky Junk's Saturday Nite Special
Related Posts Plugin for WordPress, Blogger...